MyEye4DIY.com

"My Eye for DIY" - No Rules, Just Guidelines!

  • Blog
  • DIY Project Tutorials
    • Home Decor
    • Room Makeover
    • Furniture Rehab
    • Kids Home Decor
    • Event Decorating Ideas
    • DIY Workshops
    • DIY Projects With eHow
  • Lifestyle
    • Beauty
    • Fashion
  • MyEye4DIY TV
  • About
  • Contact

May 21

Make a DIY Upholstered Storage Ottoman [Watch]

As an Amazon Associate I earn from qualifying purchases.

This DIY Upholstered Storage Ottoman creation was sponsored by Retique It. All opinions are my own.

Hey everyone! I stained, upholstered & styled my DIY storage ottoman and I did it myself which means you can too!

When our oldest started crawling, we ditched our living room coffee table in leu of safety, leaving us without some basic functionality & storage. Three years and two toddlers later, my husband would like an ottoman to rest his feet. Of course I go into full DIY mode to create a contemporary ottoman that will fit our living room decor and provide us extra storage!

We all can use storage solutions in our lives, right?! Here are all the steps and mistakes I learned in the process of staining and styling our new DIY Upholstered Storage Ottoman!

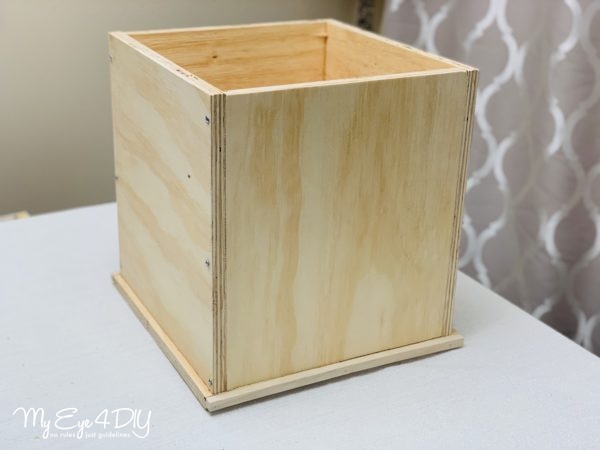
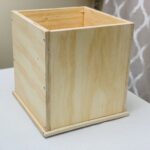
Step One: Build or Acquire An Ottoman

I started off by building my ottoman, if you’re looking for a project to take on, see the full tutorial here! You can also use an old ottoman or thrift find you’d like to refresh. Another option, purchase a storage cube, then use the dimensions to create an upholstered top by following the steps below.

Step Two: Prep Ottoman Surface for Staining

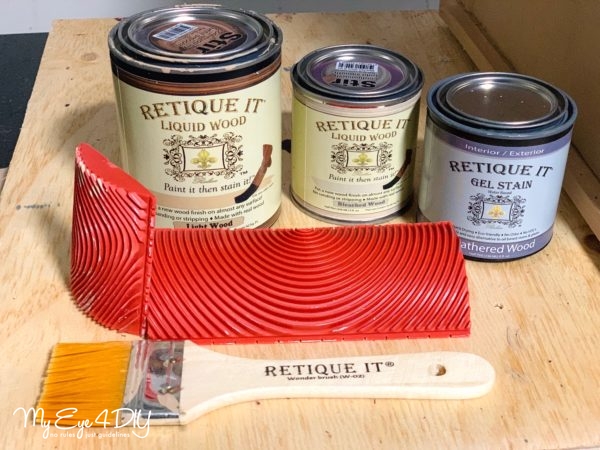
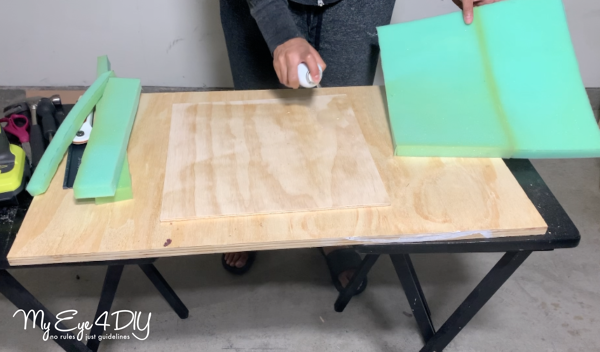
I’m trying Retique-it Liquid Wood and their gray gel stain to get the contemporary feel I’m going for. Yes, my ottoman is already made from wood, however, the grain is horizontal on some sides and vertical on others. The liquid wood literally goes on as a fresh layer of wood, no mater what material you are applying it to. If you’d like to stain a piece of furniture with old paint, something made from laminate or even plastic, you can apply liquid wood, use the graining tool to add grain marks back onto it and then stain and it will look exactly like a wood based piece of furniture.  Striping/sanding is not necessary at all so your project time…slashed in half!

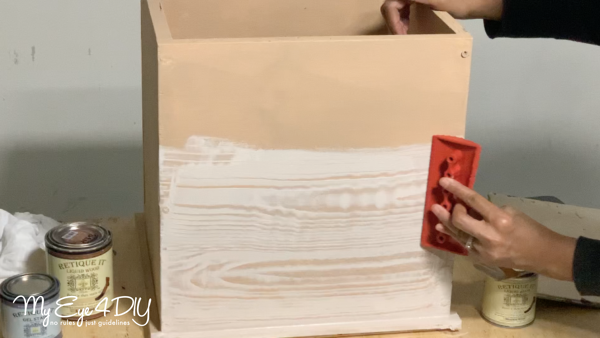
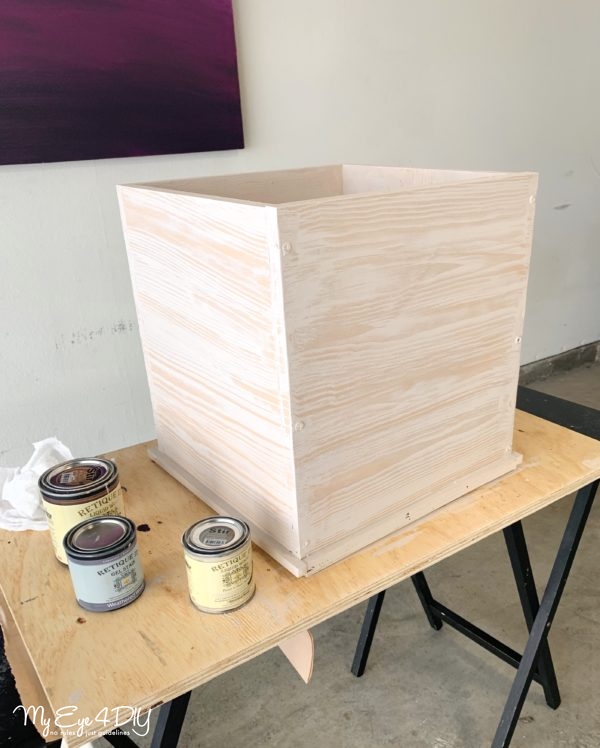
 I started by applying the base layer of liquid wood in ‘Light Wood” and allowed it to dry about 2 hours. I went over it with a lighter layer, of liquid wood in “Bleach Wood” and immediately used the graining tool to add what I call a new DIY grain. The graining tool isn’t necessary but I was pleasantly surprised as how well it turned out after applying it one row at a time. I did this on all four sides making sure the grain was now going in the same direction. 
It looks so good, you could leave it just like this…but we’ll keep going! If you’d like, you could sand it down lightly before applying your stain but it’s totally not necessary with this technique. S

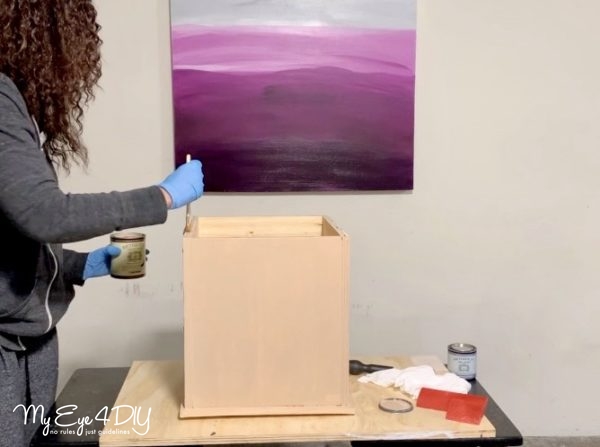
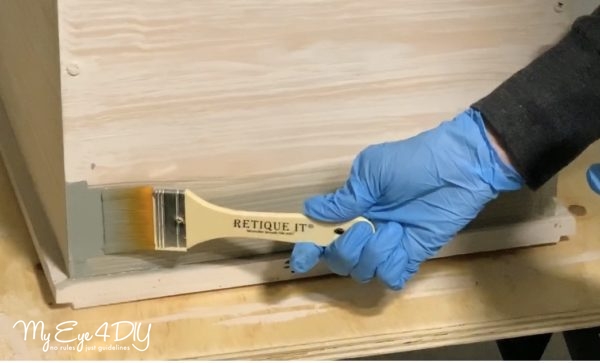
Step Three: Stain Ottoman

Once this graining technique dried, I applied two coats of a water based gel stain in weathered gray. You can use a paint brush going it in a back and forth motion being  sure to start at the bottom and work up to the top.
DON’T: On the first coat, I didn’t go around one last time to wipe off any excess stain, as a result I had some minor drip marks along the edges once it dried. It’s not super noticeable with the second coat but I know it’s there. 

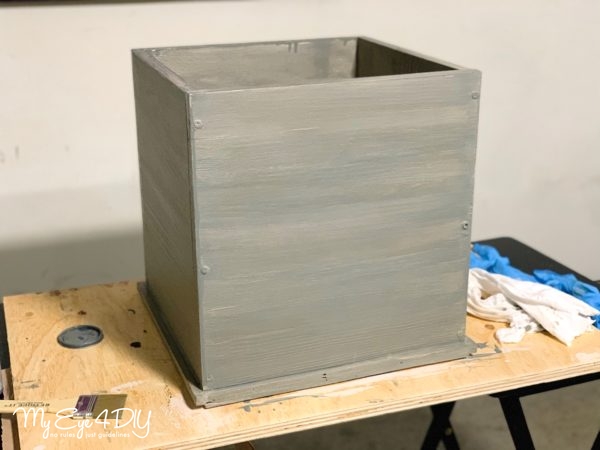
After the stain dried, I applied a protective layer of polyurethane to seal it and give a beautiful  satin finish. I also add felt pads to the bottom four corners of the ottoman to protect our floors. 

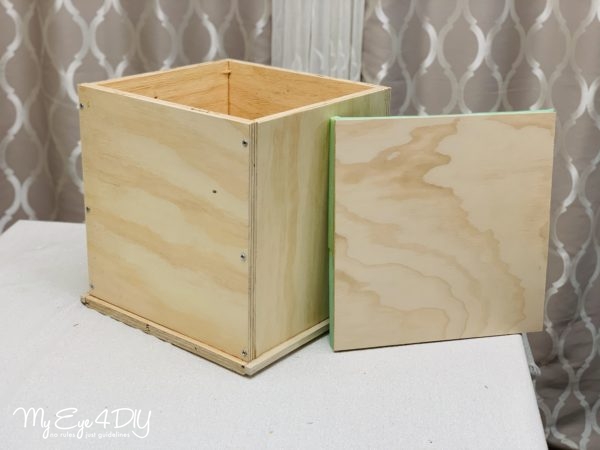
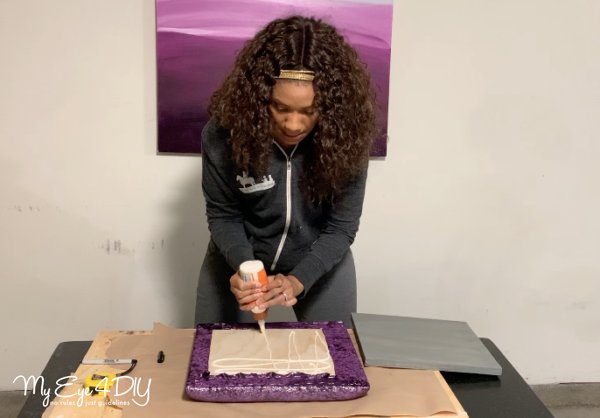
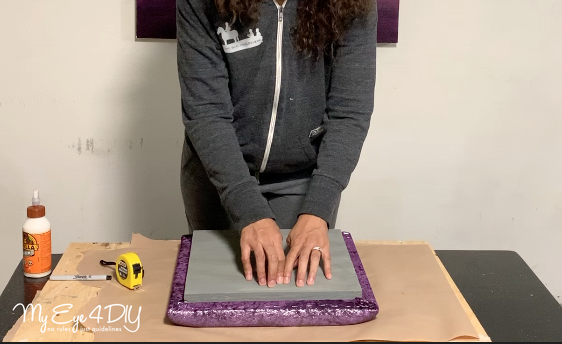
Step Four: Upholster the Top of Ottoman

I had my local hardwood store cut a very thin piece of plywood using the dimensions of the top of my ottoman (15’x15’). I also had an additional piece cut two inches smaller to apply under the top of ottoman so it fits firmly without shifting.

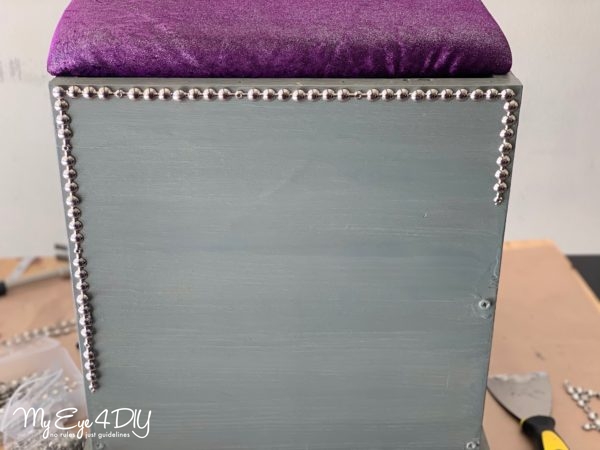
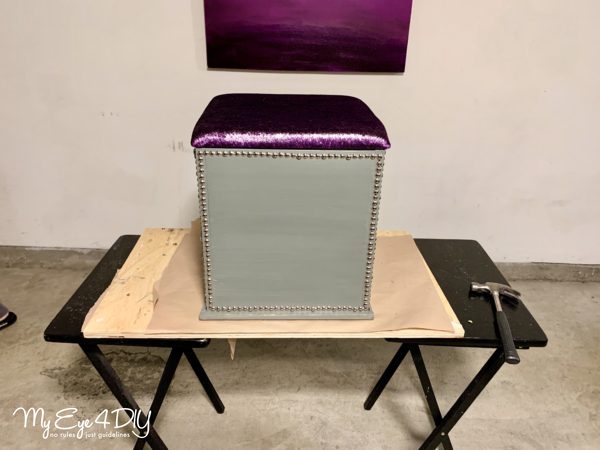
Step Five: Style Ottoman

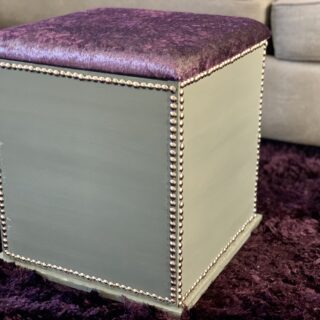
Make this contemporary ottoman complete by styling with nailhead trim! 
I purchased a kit on amazon. If I had it to do over I would have purchased the long continuous pieces as opposed to the shorter pieces, only because it was more difficult to fit the individual pieces to the specific measurements of my ottoman.

There you have it, a GORGEOUS hand made upholstered storage ottoman that you can brag about! I love the finished product, it looks high end and the stain technique came out pretty cool for my first time! I’ll definitely be using it on some tv trays we have that need a refresh!

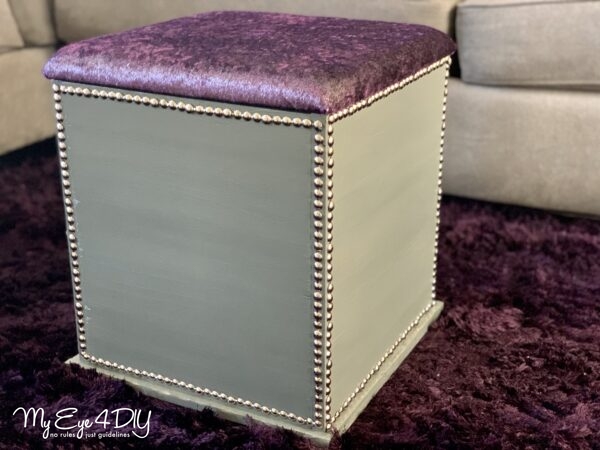
I love the removable upholstered top and the storage is one of my favorite components! The sleek lines along with the nailhead trim really bring out the modern decor of our living room, and let’s not forget to brag on the quality and timelessness

Lessons Learned

  • I would have preferred the base of my ottoman to stand 12”-13” in height rather than 15” in height (this does not include the hight of the upholstered top). That way, I could have added legs or small wheels to the bottom.
  • The height of my ottoman is perfect as is, however, it would be too high if I add legs or wheels at the existing height.  

What I Love

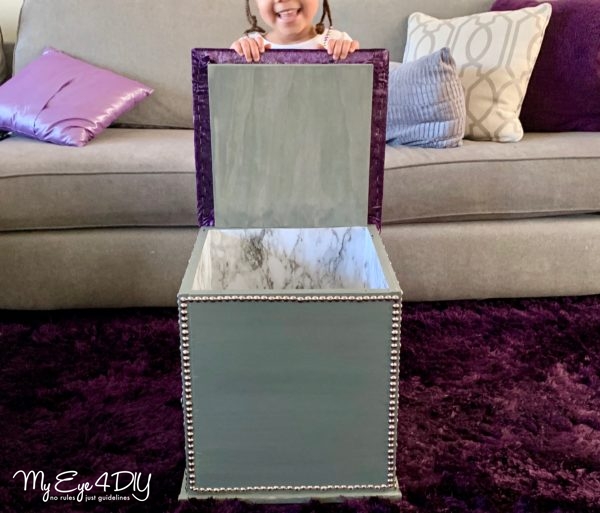
  • The removable upholstered top.
  • The storage is one of my favorite components!
  • It’s super durable
  • The sleek lines along with the nailhead trim really bring out the modern decor of our living room!
  • It’s Modern & Timeless Storage Ottoman

I hope you are inspired to try staining something around your house and make it your own! Trust me, the family will definitely want to get in on the action, the storage ottoman is a hit in my house!! 

You can see my full Video Tutorial here!

Amazon and the Amazon logo are trademarks of Amazon.com, Inc, or its affiliates.

Related Posts

  • Craigslist Bookcase MakeoverCraigslist Bookcase Makeover
  • “DIY MY HOUSE” Living Room!“DIY MY HOUSE” Living Room!
  • Cozy Couch Edition Part 1: Cutting Board Turned Sofa Arm TrayCozy Couch Edition Part 1: Cutting Board Turned Sofa Arm Tray
  • How To Make a DIY Storage OttomanHow To Make a DIY Storage Ottoman
  • Decorating with Fringe! Endless possibilities…Decorating with Fringe! Endless possibilities…
  • Old Dresser…New Era!Old Dresser…New Era!

Share this:

  • Facebook
  • Pinterest
  • Twitter
  • Google
  • More
  • LinkedIn
  • Email

Filed Under: Decorating & Crafting Projects, Furniture Rehab, Home Decor, Project Tutorials, Videos | 1 Comment

« Stay Home Decor Projects!
Turn Your Favorite Quote into Wall Art Using Transfer Paper »

Trackbacks

  1. Add Texture & Style To A Bookcase With Self Adhesive Velvet says:
    at 5:15 pm

    […] Make a DIY Upholstered Storage Ottoman […]

    Reply

Leave a Reply Cancel reply

Search The Blog

Read More

Let’s Connect!

  • Email
  • Facebook
  • Instagram
  • Pinterest
  • YouTube

Subscribe to Posts Via Email

Watch MyEye4DIY TV


More From MyEye4DIY TV!


youtube

Sponsorship

info@myeye4diy.com

Instagram

The WOW factor your kids room may be missing! I ha The WOW factor your kids room may be missing! I have a cool hack that will instantly brighten your kids room or nursery and help them learn! ⠀⠀⠀⠀⠀⠀⠀⠀⠀
⠀⠀⠀⠀⠀⠀⠀⠀⠀
Head over to the blog to see how you can turn pool noodles into a huge rainbow for your home decor! When it’s done, you can hang it up in your children’s bedroom or play room for that WOW factor its been missing.⠀⠀⠀⠀⠀⠀⠀⠀⠀
⠀⠀⠀⠀⠀⠀⠀⠀⠀
It has actually been a great learning tool for our girls as well; helping them learn colors and even a little about weather. Over time, they've slowly started to identify the alphabet letters I added underneath. ⠀⠀⠀⠀⠀⠀⠀⠀⠀
⠀⠀⠀⠀⠀⠀⠀⠀⠀
Do you like decorating with color? Let me know what other Kid inspired DIY projects you'd like to see!⠀⠀⠀⠀⠀⠀⠀⠀⠀
⠀⠀⠀⠀⠀⠀⠀⠀⠀
Click link in bio for blog post. ⠀⠀⠀⠀⠀⠀⠀⠀⠀
#homedecor #Myeye4diy #DIYwallart #Rainbowwallart #weekenddiy #DIYprojects #wallart #Kidsroom #playroom #DIYRainbow #Rainbowhomedecor #poolnoodlehack #Ikeahack #Nursery #nurserydecor #kidsdecorations
Top 10 Indoor Kid Activities! It's not my usual DI Top 10 Indoor Kid Activities! It's not my usual DIY Home Decor project, but I was thinking about my fellow moms and want to share some of the indoor activities that have been keeping our family sane during this crazy time. You could literally start the fun immediately after reading this.
:
:
:
:
:
:
#Myeye4diy #homedecor #diy #diycrafts #momlife #stayathomemoms #stayathomemom #stayathomemomma  #todlerplayideas #toddlerplay #playathome #makewayforplay
#indooractivitiesforkids
#counting #sensoryplayideas #sensoryplay #sensorybin 
#finemotoractivity #trayoftheday #colors  #ourfunfactory #createmakeandplay #preschoolactivities #preschoolathome #earlyyearsactivities #earlychildhoodeducation #earlylearning #summerplay #summeractivitiesforkids #lockdownactivitiesforkids
Hey Everyone! It’s a beautiful day to grab suppl Hey Everyone! It’s a beautiful day to grab supplies for a ‘Weekend DIY’! Not an experienced painter, NOT A PROBLEM! I’m not either! But I love how my weekend project came out and want to share this short tutorial to help you step up your wall art. 
:
What colors are catching your eye these days?
:
Comment below with any questions and please tag me with your projects! 

Click link in bio for blog post. 
#homedecor #Myeye4diy #DIYwallart #ombrewallart #weekenddiy #DIYprojects #wallart #purplehomedecor #diy
Upgrade an ordinary old bookcase into a velvet tro Upgrade an ordinary old bookcase into a velvet tropical gem! Watch Live today at 4p PT on Facebook @hometalk.:
:
:
:
:
:
#homesecor #diyhomesecor #myeye4diy #bookcasemakeover #tropicalbookcase #contactpaper #velvetdiy #tropicalfurniture #tropical #diy #furnituremakeovers
Easy DIY No-Sew Pillows! Learn 2 techniques today Easy DIY No-Sew Pillows! Learn 2 techniques today 4p PT on HometalkTV. Change up your pillow game for the spring! Video tutorial will be on their Facebook page and website. Click link in their bio @hometalk. :
:
:
:
:
#nosewpillow #decorativepillows #nosew #sequinpillow #reversablesequins #pillow #diypillow #homedecor #diyhomedecor #myeye4diy #socialdistancing #diy #diyprojects #stayhome #videotutorial #purplepillow
Since we’re all home now, it’s a good time to Since we’re all home now, it’s a good time to get creative...let me show you how to make a kids kitchen set out of a few supplies you probably have around the house! See my full tutorial on eHow.com :
:
:
:
#diyKitchenplayset #diycardboardkitchen #kitchenplayset #myeye4diy #quarentine #toddlerlife #toddlerplay #toddlerplaytime #homeschool #kidplay #diy #howto #play #kitchendesign #diyprojects
Took this shoe storage up a notch...turned it into Took this shoe storage up a notch...turned it into an upholstered bench. Watch full tutorial on @hometalk TV today at 5p PT/8p ET. Follow my hometalk page for alerts on all my future videos! Thanks everyone! /
:
:
:
:
#myeye4diy #hometalk #homedecor #diy #diyvideos #diyexpert #diyblogger #shoestorage #diybench #diyhomedecor #upholsteredbench
‘I Love You’ Photo Frame tutorial today at 4p ‘I Love You’ Photo Frame tutorial today at 4p PT/7P ET. See how these wood letters transformed into this super cute Valentines Day Gift idea. :
:
:
#diyhomedecor #blogger #diyblogger #homedecor #valentines #valentinesgiftideas #valentinesgift #photoframes #woodletters #diy #myeye4diy #valentinesframe #cupid #interiordiy #interiordesign #interiordiyer
Turn Dollar Store supplies into a gorgeous DIY Riv Turn Dollar Store supplies into a gorgeous DIY River-Rock Welcome Doormat! See my full tutorial at eHow.com :
:
:
#diyhomedecor #diydoormat #diy #ehow #diyblogger #blogger #interiordesign #diyinterior #interiordiy #frontdoor #refresh #stones #diytutorial #homedecor
Follow on Instagram

Pinterest

Visit My Eye 4 DIY's profile on Pinterest.

Categories

Subscribe to Posts Via Email

  • Email
  • Facebook
  • Instagram
  • Pinterest
  • YouTube

Copyright © 2023 My Eye 4 DIY · Design by Melanie Anne Creative · Powered By Wordpress

loading Cancel
Post was not sent - check your email addresses!
Email check failed, please try again
Sorry, your blog cannot share posts by email.