As an Amazon Associate I earn from qualifying purchases.
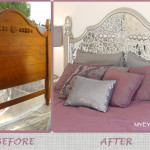
“THE STORY” 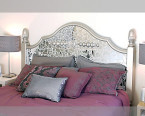 Knowing my love for DIY projects, my friend called me as soon as she saw that our neighbors left a headboard and footboard on the sidewalk. I practically jumped through the phone screaming GO GET THEM! She joined in on the fun and took the headboard while I took the footboard. I was a little unsure of what to do with it at first because it had what I THOUGHT was an odd design in the middle of the headboard. At the time I really wanted a mirrored dresser and then it all started to click…”Why not try a mosaic mirror design on the headboard?”…and so it began. After some lengthy googling, I decided on the ‘new’ look and how to go about achieving it. I was all about taking this side-walk wooden blunder and turning it into a headboard wonder!
SUPPLIES
- (1) Donated headboard $FREE
- 2-3 Full length door mirrors $5.99
- (1) Can of Nickel Satin spray paint $3
- (1) Can of Dark Gray spray paint ($3)
- (1) Plastic putty knife
- (1) Sponge $3
- (1) 1QT Pre-Mixed Adhesive Grout $8
- (1) 1QT Ceramic Tile Adhesive $5
- (1) Hammer
- Garbage bag, gloves, old news paper, windex
Why pay more when you can make it for less?

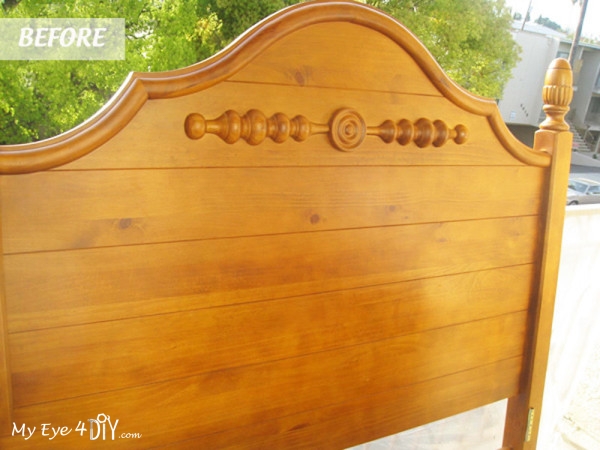
STEP 1: FIND A HEADBOARD – I found a FREE headboard outside of my neighbors house. You can also search yard sales or craigslist.
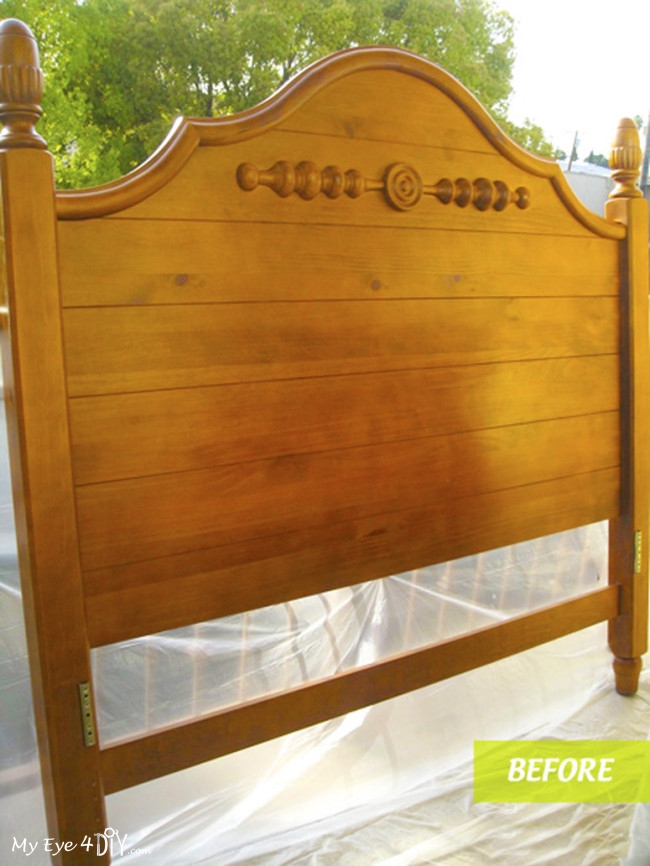
STEP 2: PREP THE HEADBOARD
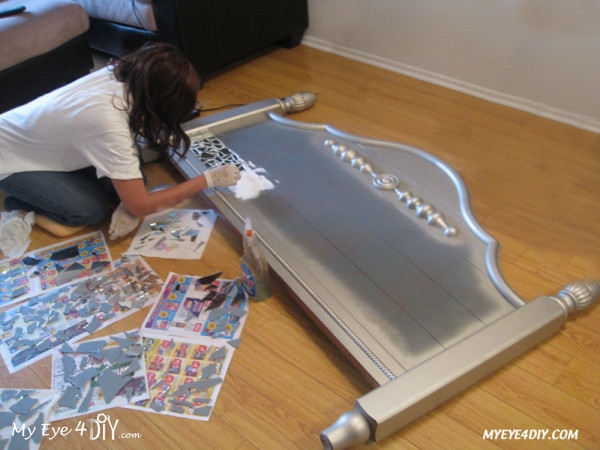
– I spray painted the headboard on my balcony, as a result I prepared by covering the entire area with a plastic tarp & placing the headboard on top of it.
– The headboard was ‘used’, the OCD in me said WIPE IT DOWN! Use the cleaning agent you are most comfortable with & allow to dry completely.
– Initially, I was going to try to remove the design that’s smack in the middle of the headboard because I thought it was “odd”. However, the character grew on me so I kept it. Glad I did, after the spray paint it looked really cool.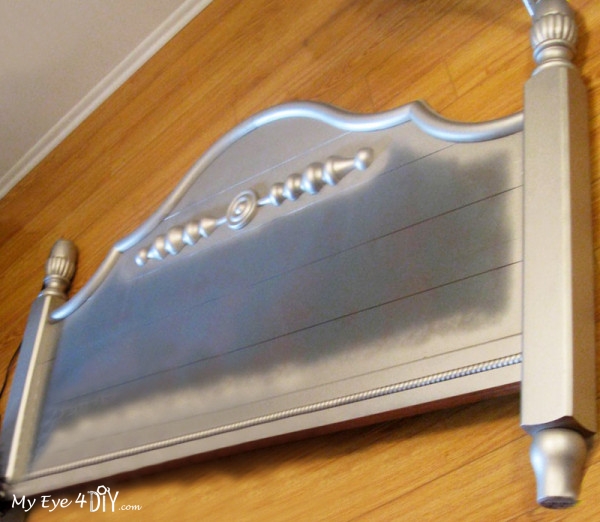
STEP 3: SPRAY PAINT
– Prime front of headboard with 1-2 coats of Dark Gray spray paint from local hardware store. (Allow to dry completely, approx 1 hour)
– Apply 2 coats of Nickel colored spray paint. (Spray around perimeter of the headboard. No need to waste spray paint on the middle where we will be laying down the reflective glass pieces.)
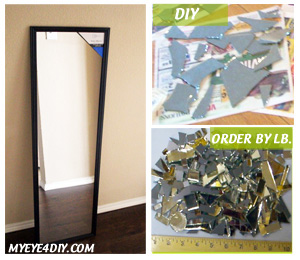
STEP 4: Make Mirrored Glass Mosaic Pieces
– You can DIY your own Mirrored Tile glass pieces or you can order them from an online source by the pound. The choice is yours, I went the DIY route of course. If you choose to order them you can skip the instructions below & move to the next step.
DISCLAIMER: BE CAREFUL! WEAR SAFETY GLASSES & GARDEN GLOVES to protect from shattered glass pieces.
– Purchase (2) 20×30 mirrors from Walmart, Target, Home Depot, Lowes or you can try and find them for FREE on craigslist. While headboard is drying, go outside and break them into pieces with a hammer to get reflective mosaic glass pieces.
– PROCEED WITH CAUTION: Wearing your gloves, place mirrors inside a trash bag or a long flat cardboard box before taking your hammer to the mirror. This will assure that no glass pieces shatter on or cut you.
– After hammering the entire length of the mirror, carefully pull mirror out of trash bag (still in it’s frame) and select pieces you would like to use for your mosaic collage. Repeat this process with the second mirror. (If you have a large headboard, you may need 2 or more mirrors.)
– All pieces will not be usable, it will require a little time & patience selecting the best ones.
– Carefully wipe off the best selected mirror glass pieces with a disposable towel (there will be shattered pieces on them) and place them neatly onto old newspaper next to headboard.
STEP 5: Now you’re ready to get your mosaic on!
– Purchase Ceramic Tile Adhesive Grout ($5) from your local hardware store.
– Use your Plastic Putty Knife and apply a 4×4 share (about 2cm thick) of Ceramic Tile Adhesive to your headboard. Then add your pre-selected mirror pieces until the grouted area is covered leaving about 1cm between each piece. Repeat this process multiple times until your headboard is fully covered. The reason for applying the mosaic design in 4×4 inch sections is so that the Ceramic Tile Adhesive does not dry during the process of applying the mirrored pieces from left to right. It dries rather quickly as you go.
– Generously apply enough adhesive so that you are able to press the mirrored glass pieces down assuring it’s secured and will adhere once dry.
 – Let adhesive dry allowing the glass pieces to fully bond for 12-24 hours.
FINAL STEP: Applying Pre-Mixed Adhesive Grout
SAFETY NOTE: I’ve received a lot of questions regarding the safety of having a mirrored glass headboard. This is the step at which you can assure you will not be cut by any of the mirrored glass pieces once your headboard has fully set.
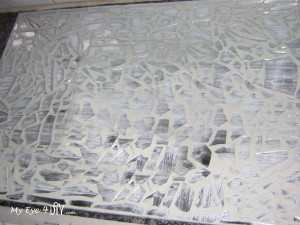
– You will want to fill the gaps in between each mirrored glass piece by GENEROUSLY applying a coat of the Pre-Mixed Adhesive Grout over the entire headboard. This will bond everything together and give you the desired Mosaic Design finish.
– Take your plastic putty knife and scoop out a fist full of Grout Adhesive. Start by applying at the bottom and working your way to the top until all grooves are completely filled in. Make sure the grout is filled to the top of each glass piece. This will assure that you will not cute your hand on any of the pieces once it is set. If you cover some of the mirrored glass pieces by accident don’t fret!
– The last step will be to take a wet sponge/cloth and remove any grout overlay from the mirrored pieces. Start from one side of your headboard in sections and finish at the other side.
– Allow to dry for 12-24 hours.
– Spray windex on a dry cloth, wipe down all the mirror pieces of your new Mirrored Glass Mosaic Headboard, completing your masterpiece!
CONGRATS! You are all done!
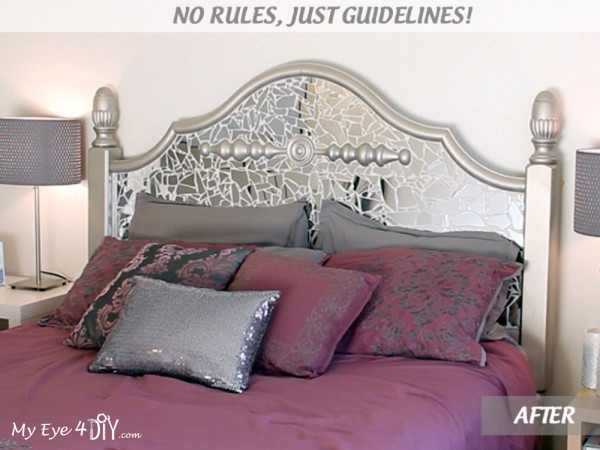
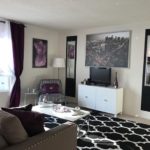
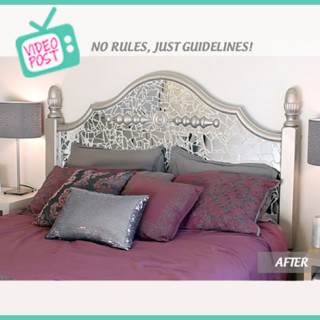
I decided to add this piece to my bedroom which has an upscale purple and silver theme happening. My first thought: “Get rid of the wood and add some glamour!”
NOTE: I did lots of web research to learn how to do this process, the steps above are the most simplified strategy I came up with. Please feel free to do your own research if you are a real perfectionist! Hope you enjoy!
For More Awesome Tutorials & Regular Video Updates! 

Amazon and the Amazon logo are trademarks of Amazon.com, Inc, or its affiliates.
![Make a DIY Upholstered Storage Ottoman [Watch]](http://myeye4diy.com/wp-content/uploads/2020/05/IMG_1060-2-150x150.jpg)


This is truly a gorgeous re-do! I’m usually not too keen on broken mirror/cd/glass mosaic projects but this one is stunning. I am now following you on Pinterest! I, too, inherited the budget wise design gene from my immensely talented mom. A cherished legacy. I look forward to seeing more of your projects! God bless!
Wow this is gorgeous, I love, love, love, this piece I am really into the silver and the glass, sooo elegant. Great sense of style and a awesome job you did!!!!!!
Love your head board!! Your video was great, love the bloopers, you are a doll!
You are amazing. This is truly the best idea I have seen on the web in years. Beautiful piece!!!
This is gorgeous! What a great idea, I’ve inherited my grandparents’ bed and can’t wait to try something similar.
I hope you make a lot of money doing these makeovers! You are incredibly creative and everything always takes my breath away! Fabulous makeover!
Cheryl, you are super sweet. Thank you so much, I really appreciate that.