MyEye4DIY.com

"My Eye for DIY" - No Rules, Just Guidelines!

  • Blog
  • DIY Project Tutorials
    • Home Decor
    • Room Makeover
    • Furniture Rehab
    • Kids Home Decor
    • Event Decorating Ideas
    • DIY Workshops
    • DIY Projects With eHow
  • Lifestyle
    • Beauty
    • Fashion
  • MyEye4DIY TV
  • About
  • Contact

Jun 18

Turn Your Favorite Quote into Wall Art Using Transfer Paper

As an Amazon Associate I earn from qualifying purchases.

Learning how to use transfer paper is as simple as following a few easy steps. And, if you’ve got a DIY project fail, it might be the perfect base for your next project.

Have you ever tried a DIY that didn’t go well? This can be super frustrating, and most of you may want to throw it away. Well, there’s a better options, consider repurposing that DIY! Let me show you how to use transfer paper and a vinyl quote to salvage a canvas painting and turn it into a piece of Transfer Paper Art!


When I created the Ombré Wall Art in our living room, there were supposed to be two canvases side by side! Sadly, the first one didn’t turn out as good as the second, so I stored it.

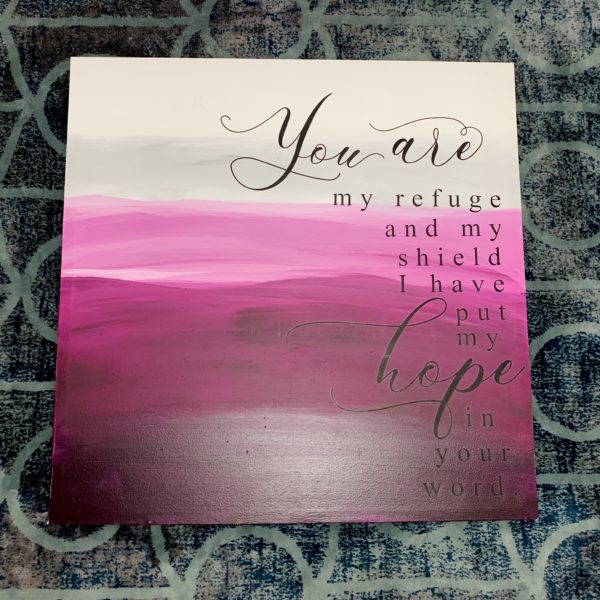
Now I’m dusting off that old wall art and applying one of my favorite bible quotes, using a word transfer to cover some of the imperfections and spruce up our boring entryway wall.
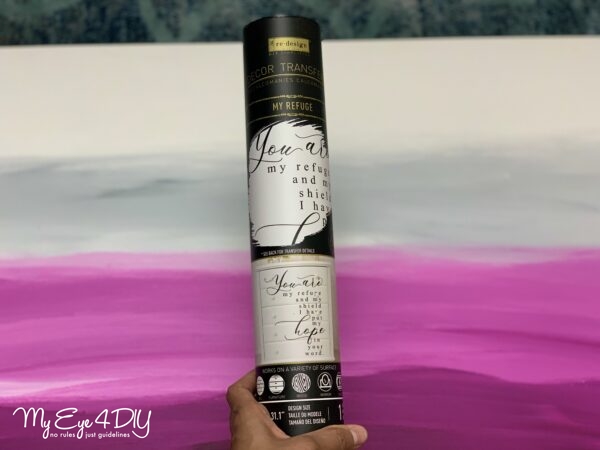
I was so happy when I found these decor transfers by Prima because they offer INSTANT results and take no time to apply which is great for my ‘nap time’ DIY’s! Here’s how you can create this look!

how-to-use-transfer-paper

Step 1: Paint Canvas

how-to-use-transfer-paper

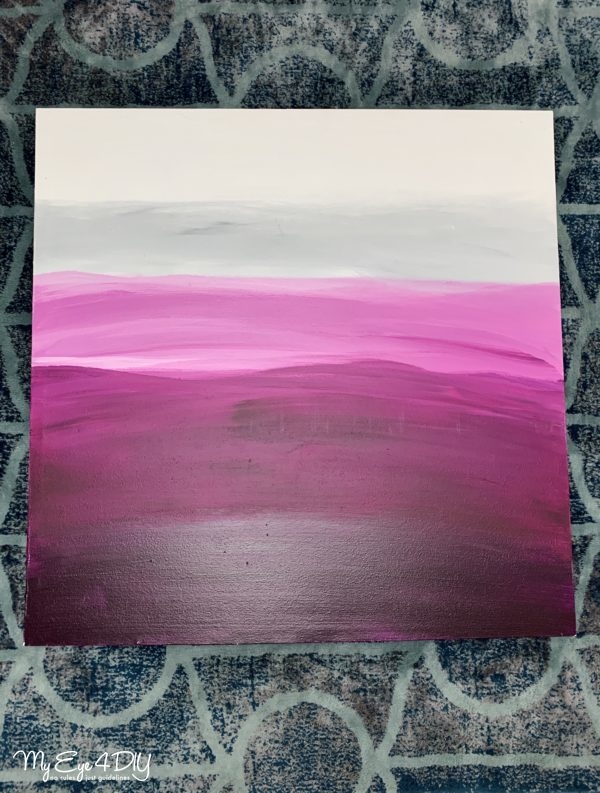
Choose your desired color scheme and paint your canvas. Make sure the colors you select don’t compete with the color of the transfer letters, you don’t want them to blend into one another. After selecting the colors, allow it to dry. You can check how I created my ombre wall canvas here.

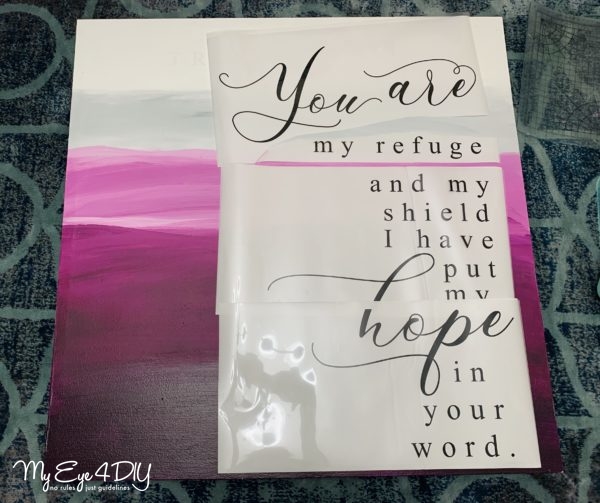
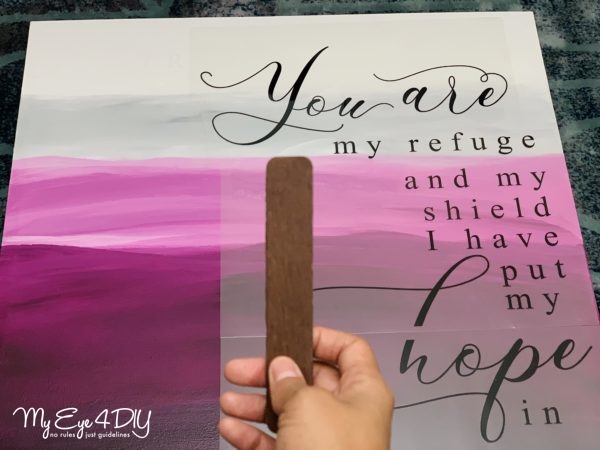
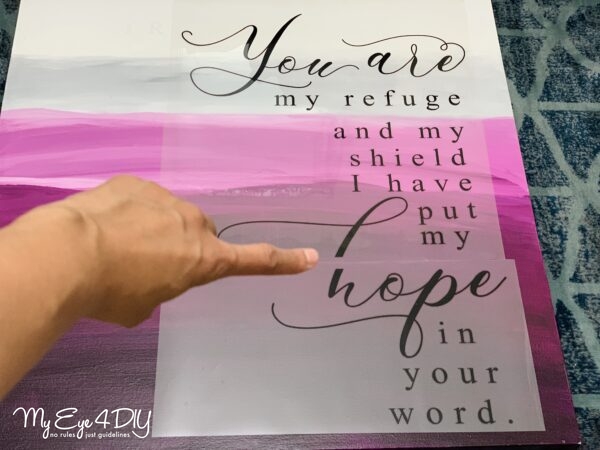
Step 2: Position Transfer Sheets on Canvas

how-to-use-transfer-paper

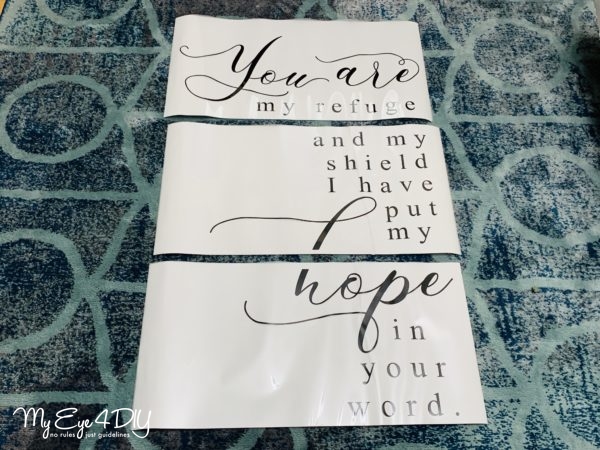
My Quote came on three separate transfer sheets. I kept the white backing on & I placed these sheets on top of my canvas to get an idea of how I wanted to position them. Play around with left, right, and center positioning to get better idea of where you’d like the placement of your quote on the canvas.

how-to-use-transfer-paper

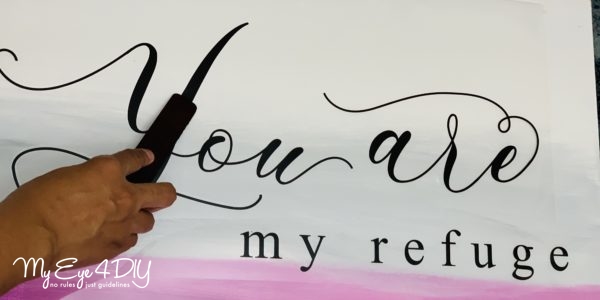
Step 3: Applying First Transfer Sheet to Canvas

how-to-use-transfer-paper-to-make-wall-art


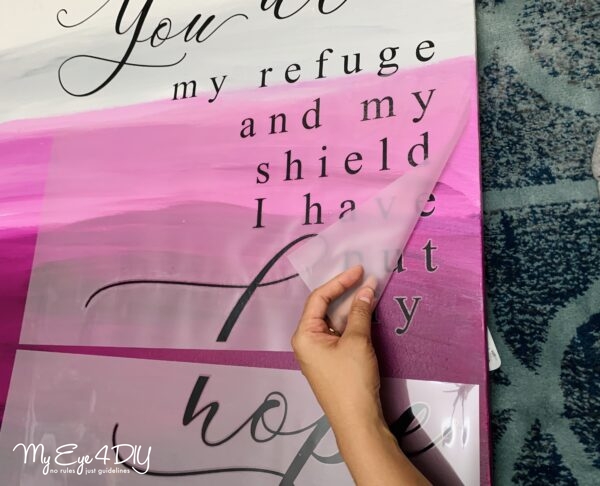
Now, you know exactly where you want each sheet positioned, it’s time to remove the white backing one sheet at a time and rub the transfer onto your canvas.
NOTE: Do not remove the backing to all layers at once. They could accidentally connect with one another and the letters may transfer to other sheets, making it unusable.
I suggest you remove the backing on the first sheet placing it in your desired position on the top of the canvas. Then, firmly rub over each letter with the transverse stick and slowly remove the plastic covering.

how-to-use-transfer-paper-add-vinyl

how-to-use-transfer-paper

how-to-use-transfer-paper

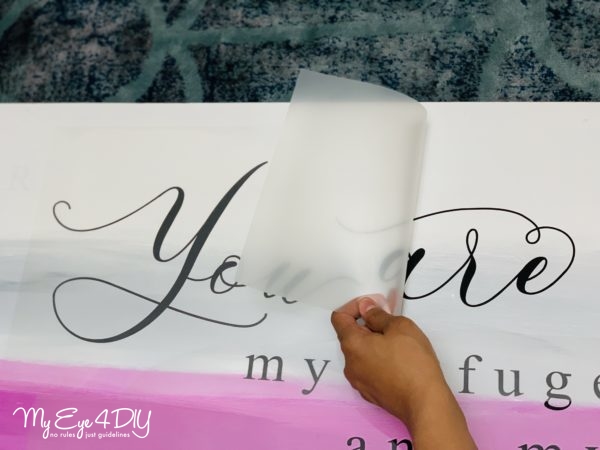
In some cases, the letters may stick to the clear film. Stop removing the plastic covering and press it back down. Firmly rub the stick over the letters once more and again peel back the plastic covering.  That should resolve the issue.

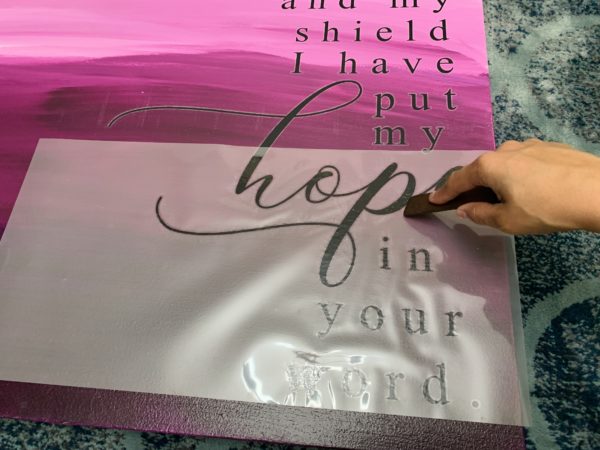
Step 4: Apply Second Transfer Sheet to Canvas

how-to-use-transfer-paper

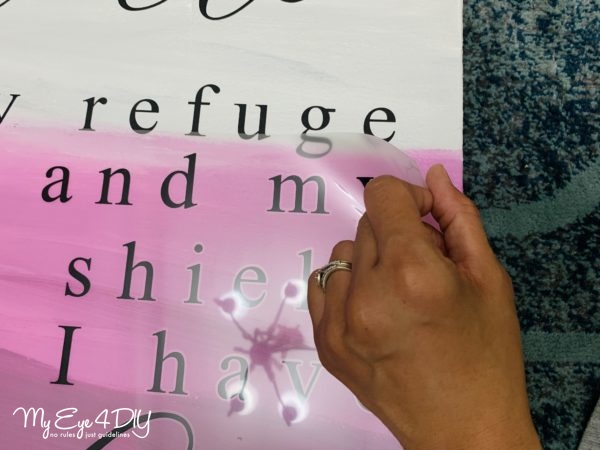
Before positioning the transfer sheet, ensure that the letter spacing is even between the letters from the first sheet and the one you are about to apply. Then, follow the procedure explained in the step above.  When you first learn how to use transfer paper, it takes a while to learn, but take your time, and it will be beautiful!

how-to-use-transfer-paper
Step 5: Apply Third Transfer Sheet to Canvas – Connecting Letters

how-to-use-transfer-paper

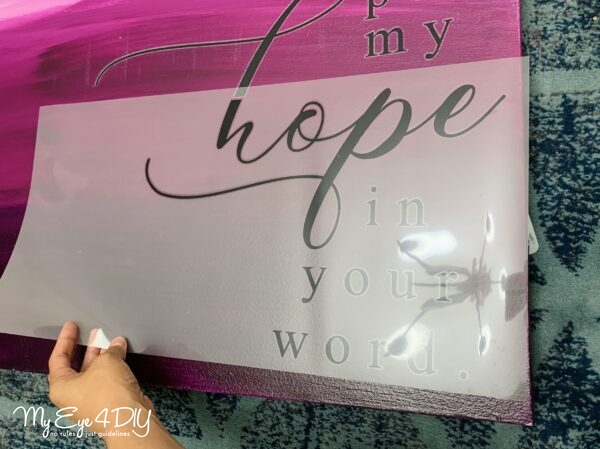
With many custom quote transfers, you will find a word divided between two transfer sheets. In this case, the alignment of the transfer sheets is crucial in blending the words together.

Here, the word “Hope” has been divided between the two bottom sheets. You have to align the word’s bottom in the third transfer sheet on the top of that word in the second transfer sheet you have already applied. After aligning the words, follow the procedure already explained in the steps above.

how-to-use-transfer-paper

turn-your-favorite-quote-into-wall-art-with-transfer-paper

how-to-use-transfer-paper

Step 6: Final Check

how-to-use-transfer-paper

Lastly, ensure that all of the letters are transferred to the canvas. I prefer rubbing my pointer finger over all the letters to smooth them out and ensure the transfer is secured to the canvas.
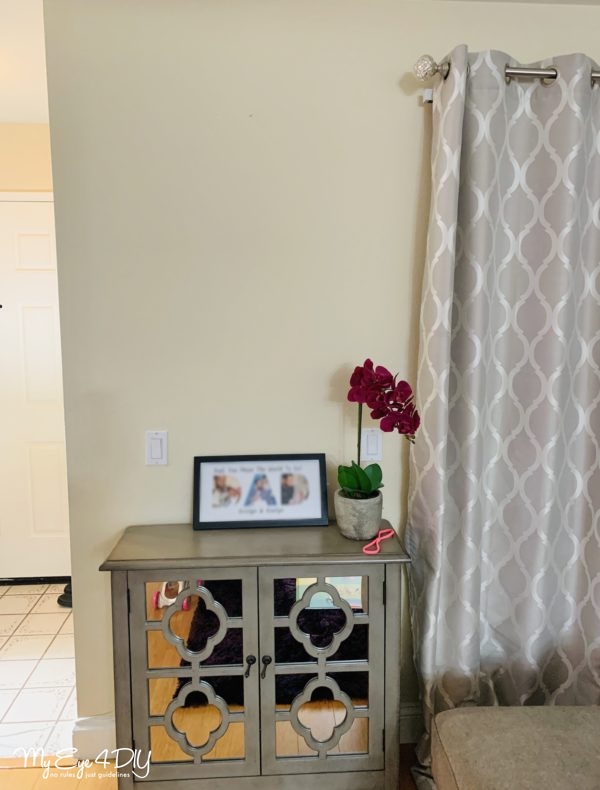
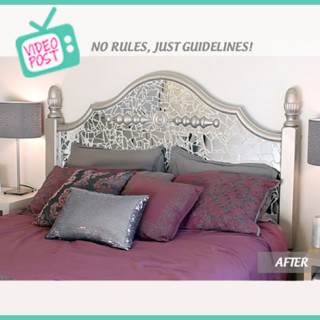
BEFORE

how-to-use-transfer-paper

AFTER

how-to-use-transfer-paper

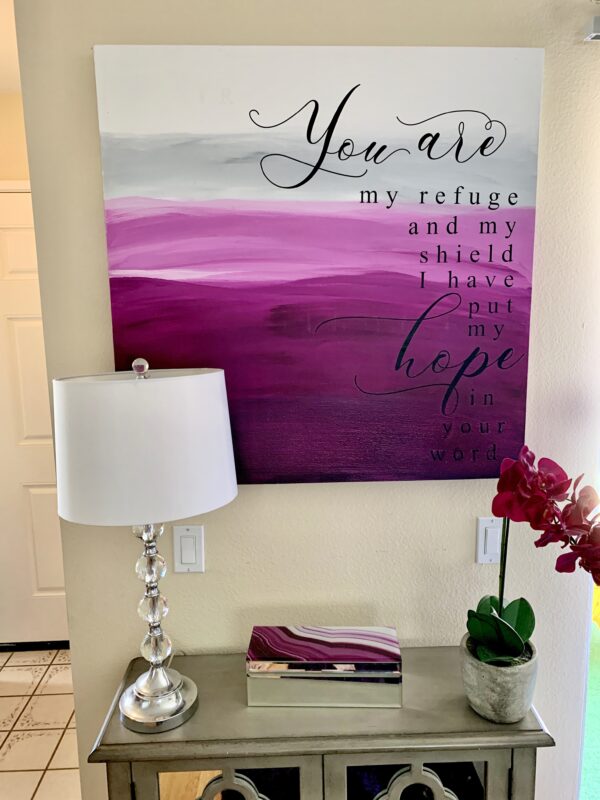
Congrats! You have successfully learned how to use transfer paper to turn your favorite quote into wall art with Redesign Decor Transfer paper. This process is so simple and gives instant results. I love it and hope you do too! Hang your new wall art in your room and enjoy!!

DIY Quote Wall Art

Love this project?  Take a look at my DIY Pom Pom Throw Blanket.  (it’s a great gift idea!)


This DIY Wall Art Quote creation was sponsored by Redesign by Prima. All opinions are my own.

Amazon and the Amazon logo are trademarks of Amazon.com, Inc, or its affiliates.

Related Posts

  • “DIY MY HOUSE” Living Room!“DIY MY HOUSE” Living Room!
  • Introducing MYEYE4DIY Workshops!Introducing MYEYE4DIY Workshops!
  • Decorating with Fringe! Endless possibilities…Decorating with Fringe! Endless possibilities…
  • Create a DIY Photo Canvas WorkshopCreate a DIY Photo Canvas Workshop
  • Stay Home Decor Projects!Stay Home Decor Projects!
  • Cozy Couch Edition Part 1: Cutting Board Turned Sofa Arm TrayCozy Couch Edition Part 1: Cutting Board Turned Sofa Arm Tray

Share this:

  • Facebook
  • Pinterest
  • Twitter
  • Google
  • More
  • LinkedIn
  • Email

Filed Under: Home Decor, Project Tutorials | 1 Comment

« Make a DIY Upholstered Storage Ottoman [Watch]
Tricycle Diaper Cake Tutorial »

Trackbacks

  1. Creating Ombre Wall Art - MyEye4DIY.com says:
    at 10:26 pm

    […] Love this project?  Next step, easily turn your New Wall Art into a Wall Quote! […]

    Reply

Leave a Reply Cancel reply

Search The Blog

Read More

Let’s Connect!

  • Email
  • Facebook
  • Instagram
  • Pinterest
  • YouTube

Subscribe to Posts Via Email

Watch MyEye4DIY TV


More From MyEye4DIY TV!


youtube

Sponsorship

info@myeye4diy.com

Instagram

The WOW factor your kids room may be missing! I ha The WOW factor your kids room may be missing! I have a cool hack that will instantly brighten your kids room or nursery and help them learn! ⠀⠀⠀⠀⠀⠀⠀⠀⠀
⠀⠀⠀⠀⠀⠀⠀⠀⠀
Head over to the blog to see how you can turn pool noodles into a huge rainbow for your home decor! When it’s done, you can hang it up in your children’s bedroom or play room for that WOW factor its been missing.⠀⠀⠀⠀⠀⠀⠀⠀⠀
⠀⠀⠀⠀⠀⠀⠀⠀⠀
It has actually been a great learning tool for our girls as well; helping them learn colors and even a little about weather. Over time, they've slowly started to identify the alphabet letters I added underneath. ⠀⠀⠀⠀⠀⠀⠀⠀⠀
⠀⠀⠀⠀⠀⠀⠀⠀⠀
Do you like decorating with color? Let me know what other Kid inspired DIY projects you'd like to see!⠀⠀⠀⠀⠀⠀⠀⠀⠀
⠀⠀⠀⠀⠀⠀⠀⠀⠀
Click link in bio for blog post. ⠀⠀⠀⠀⠀⠀⠀⠀⠀
#homedecor #Myeye4diy #DIYwallart #Rainbowwallart #weekenddiy #DIYprojects #wallart #Kidsroom #playroom #DIYRainbow #Rainbowhomedecor #poolnoodlehack #Ikeahack #Nursery #nurserydecor #kidsdecorations
Top 10 Indoor Kid Activities! It's not my usual DI Top 10 Indoor Kid Activities! It's not my usual DIY Home Decor project, but I was thinking about my fellow moms and want to share some of the indoor activities that have been keeping our family sane during this crazy time. You could literally start the fun immediately after reading this.
:
:
:
:
:
:
#Myeye4diy #homedecor #diy #diycrafts #momlife #stayathomemoms #stayathomemom #stayathomemomma  #todlerplayideas #toddlerplay #playathome #makewayforplay
#indooractivitiesforkids
#counting #sensoryplayideas #sensoryplay #sensorybin 
#finemotoractivity #trayoftheday #colors  #ourfunfactory #createmakeandplay #preschoolactivities #preschoolathome #earlyyearsactivities #earlychildhoodeducation #earlylearning #summerplay #summeractivitiesforkids #lockdownactivitiesforkids
Hey Everyone! It’s a beautiful day to grab suppl Hey Everyone! It’s a beautiful day to grab supplies for a ‘Weekend DIY’! Not an experienced painter, NOT A PROBLEM! I’m not either! But I love how my weekend project came out and want to share this short tutorial to help you step up your wall art. 
:
What colors are catching your eye these days?
:
Comment below with any questions and please tag me with your projects! 

Click link in bio for blog post. 
#homedecor #Myeye4diy #DIYwallart #ombrewallart #weekenddiy #DIYprojects #wallart #purplehomedecor #diy
Upgrade an ordinary old bookcase into a velvet tro Upgrade an ordinary old bookcase into a velvet tropical gem! Watch Live today at 4p PT on Facebook @hometalk.:
:
:
:
:
:
#homesecor #diyhomesecor #myeye4diy #bookcasemakeover #tropicalbookcase #contactpaper #velvetdiy #tropicalfurniture #tropical #diy #furnituremakeovers
Easy DIY No-Sew Pillows! Learn 2 techniques today Easy DIY No-Sew Pillows! Learn 2 techniques today 4p PT on HometalkTV. Change up your pillow game for the spring! Video tutorial will be on their Facebook page and website. Click link in their bio @hometalk. :
:
:
:
:
#nosewpillow #decorativepillows #nosew #sequinpillow #reversablesequins #pillow #diypillow #homedecor #diyhomedecor #myeye4diy #socialdistancing #diy #diyprojects #stayhome #videotutorial #purplepillow
Since we’re all home now, it’s a good time to Since we’re all home now, it’s a good time to get creative...let me show you how to make a kids kitchen set out of a few supplies you probably have around the house! See my full tutorial on eHow.com :
:
:
:
#diyKitchenplayset #diycardboardkitchen #kitchenplayset #myeye4diy #quarentine #toddlerlife #toddlerplay #toddlerplaytime #homeschool #kidplay #diy #howto #play #kitchendesign #diyprojects
Took this shoe storage up a notch...turned it into Took this shoe storage up a notch...turned it into an upholstered bench. Watch full tutorial on @hometalk TV today at 5p PT/8p ET. Follow my hometalk page for alerts on all my future videos! Thanks everyone! /
:
:
:
:
#myeye4diy #hometalk #homedecor #diy #diyvideos #diyexpert #diyblogger #shoestorage #diybench #diyhomedecor #upholsteredbench
‘I Love You’ Photo Frame tutorial today at 4p ‘I Love You’ Photo Frame tutorial today at 4p PT/7P ET. See how these wood letters transformed into this super cute Valentines Day Gift idea. :
:
:
#diyhomedecor #blogger #diyblogger #homedecor #valentines #valentinesgiftideas #valentinesgift #photoframes #woodletters #diy #myeye4diy #valentinesframe #cupid #interiordiy #interiordesign #interiordiyer
Turn Dollar Store supplies into a gorgeous DIY Riv Turn Dollar Store supplies into a gorgeous DIY River-Rock Welcome Doormat! See my full tutorial at eHow.com :
:
:
#diyhomedecor #diydoormat #diy #ehow #diyblogger #blogger #interiordesign #diyinterior #interiordiy #frontdoor #refresh #stones #diytutorial #homedecor
Follow on Instagram

Pinterest

Visit My Eye 4 DIY's profile on Pinterest.

Categories

Subscribe to Posts Via Email

  • Email
  • Facebook
  • Instagram
  • Pinterest
  • YouTube

Copyright © 2023 My Eye 4 DIY · Design by Melanie Anne Creative · Powered By Wordpress

loading Cancel
Post was not sent - check your email addresses!
Email check failed, please try again
Sorry, your blog cannot share posts by email.